
TM SIM Registration Online Link
The Philippine Government made a rule called the SIM Registration Act. It says everyone must register their SIM cards. You can register your TM SIM card using the GlobeOne App, website, or by going to the store.
To register your TM SIM card, you just need to do a few easy steps. You fill out some information and upload some documents. That’s it!

Note: The last day to register old SIM cards was December 27, 2022. After that, you cannot register old SIM cards anymore. But don’t worry, you can buy a new SIM card and register it anytime you want.
TM SIM Registration Methods
There are three ways to register your TM SIM card. You can pick the way that is easiest for you. Here are the three methods:
- Register on the TM website (new.globe.com.ph/sim register)
- Register using the GlobeOne app
- Register at a store
Note: The steps to register are the same for all ways. But the papers and information you need to give might be different for each person.
1. How to Register TM SIM on the Website
Follow these steps to register your TM SIM card using the TM website:
- First, go to the official TM website. You can also click the button below to open it.
- You can also use the TM SIM QR code. Just scan the code with your phone’s camera, and it will take you to the TM SIM website.
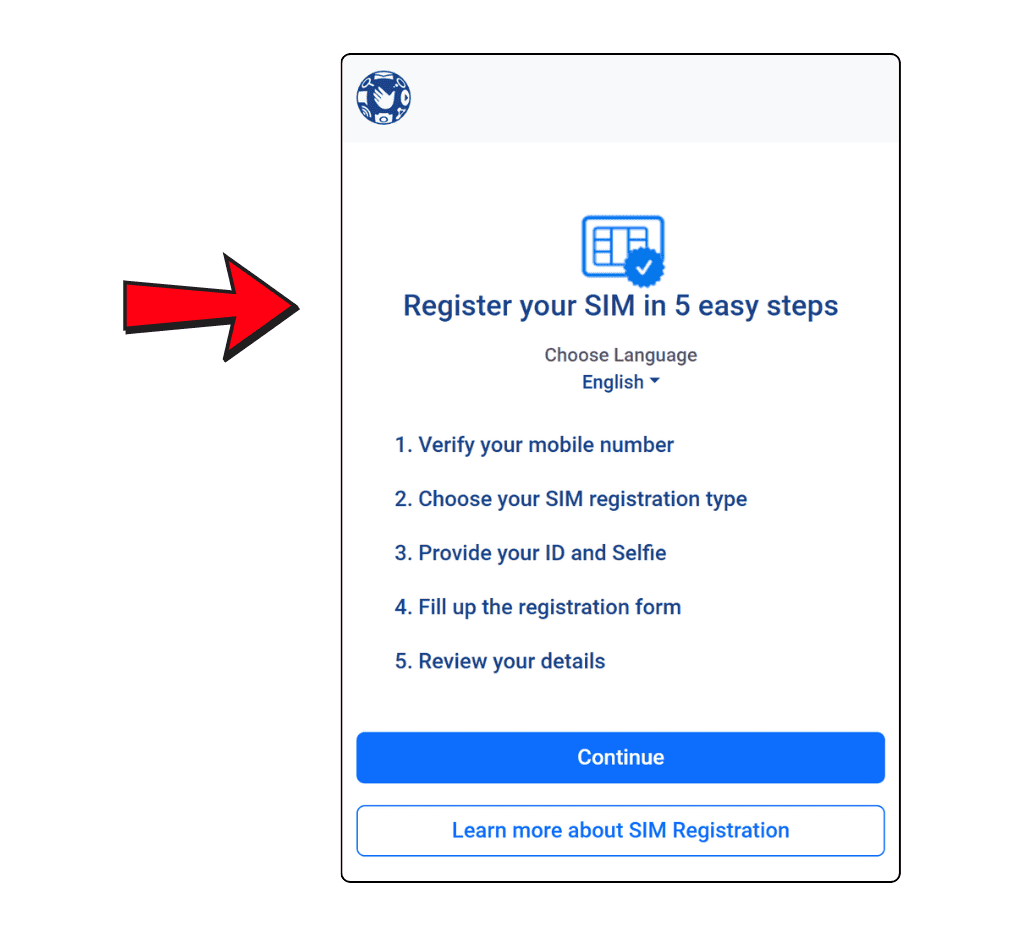
- Click on Continue to begin registering your TM SIM card.
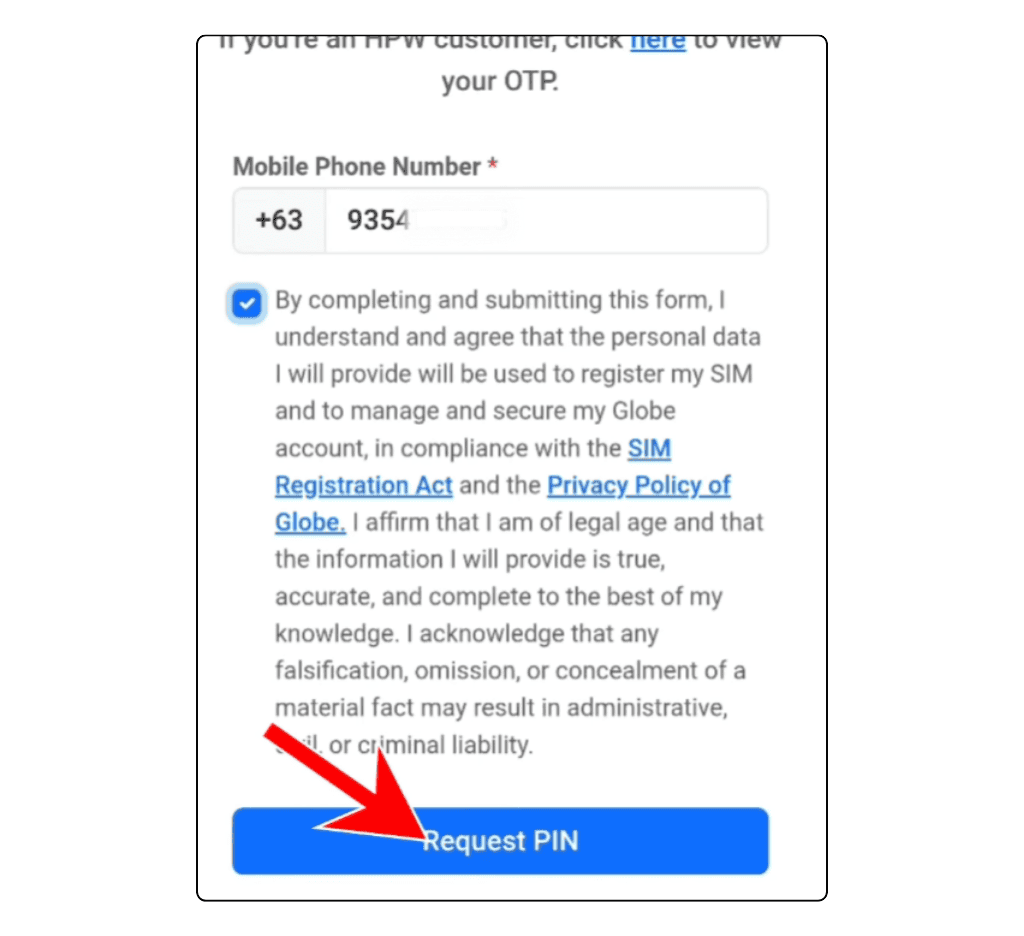
- You will need to check your mobile number.
- Type your TM number (it should start with 9) in the box.
- Then, click the box next to it and press Request OTP (One-Time PIN).
- You will get an OTP (a special code) through a text message.

- Type the OTP you got and then click Continue.
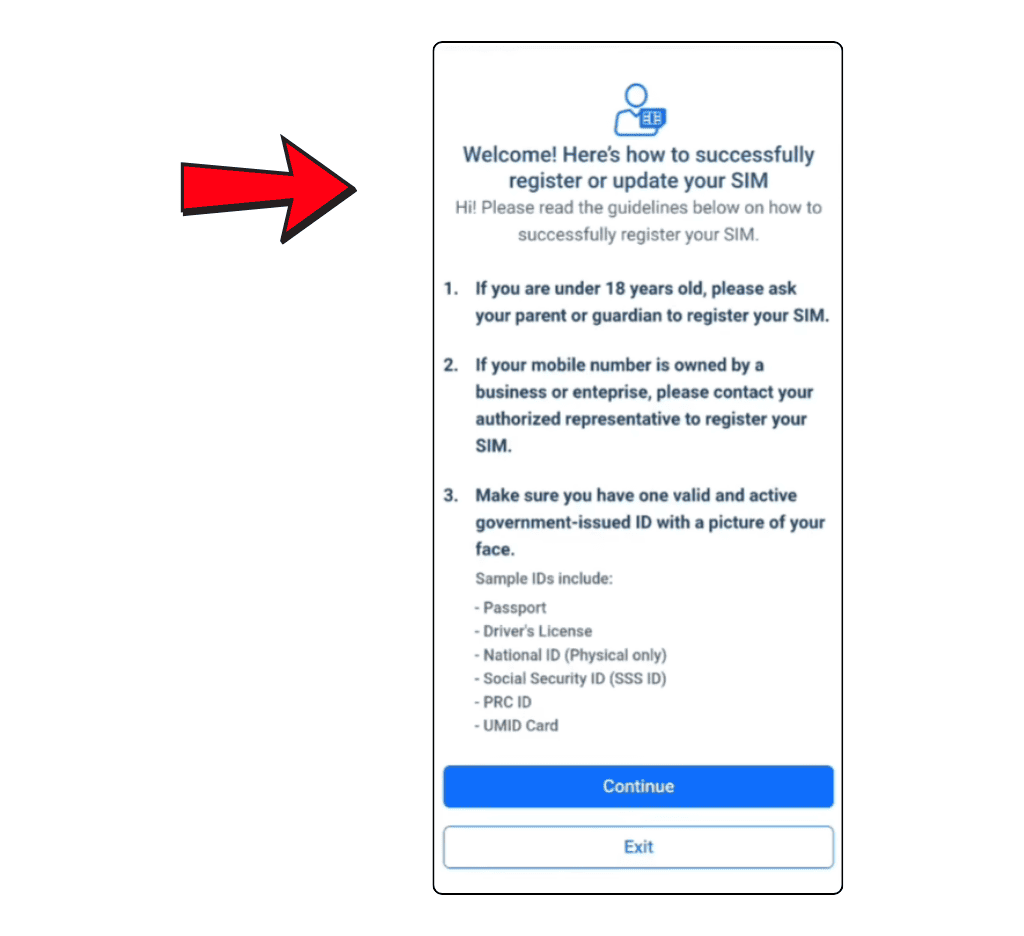
- A welcome message will show up and tell you who can register.
- Read the rules and then click Continue.
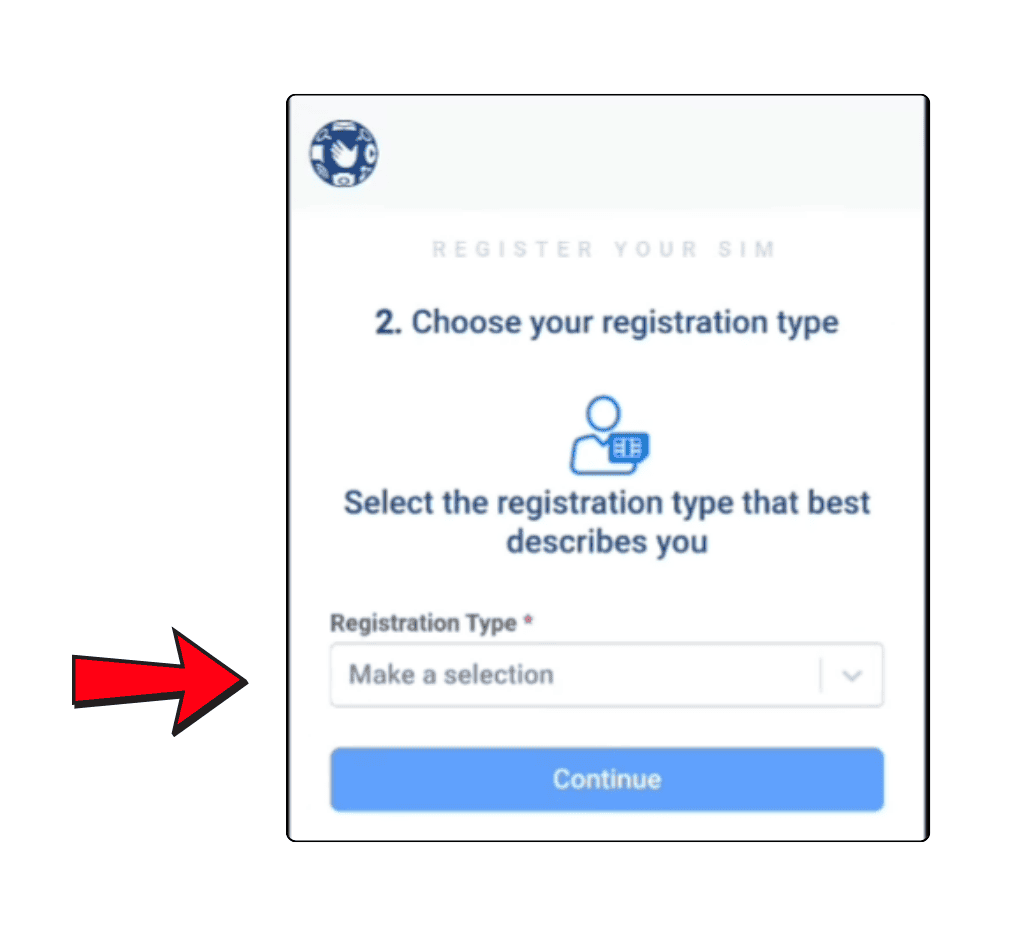
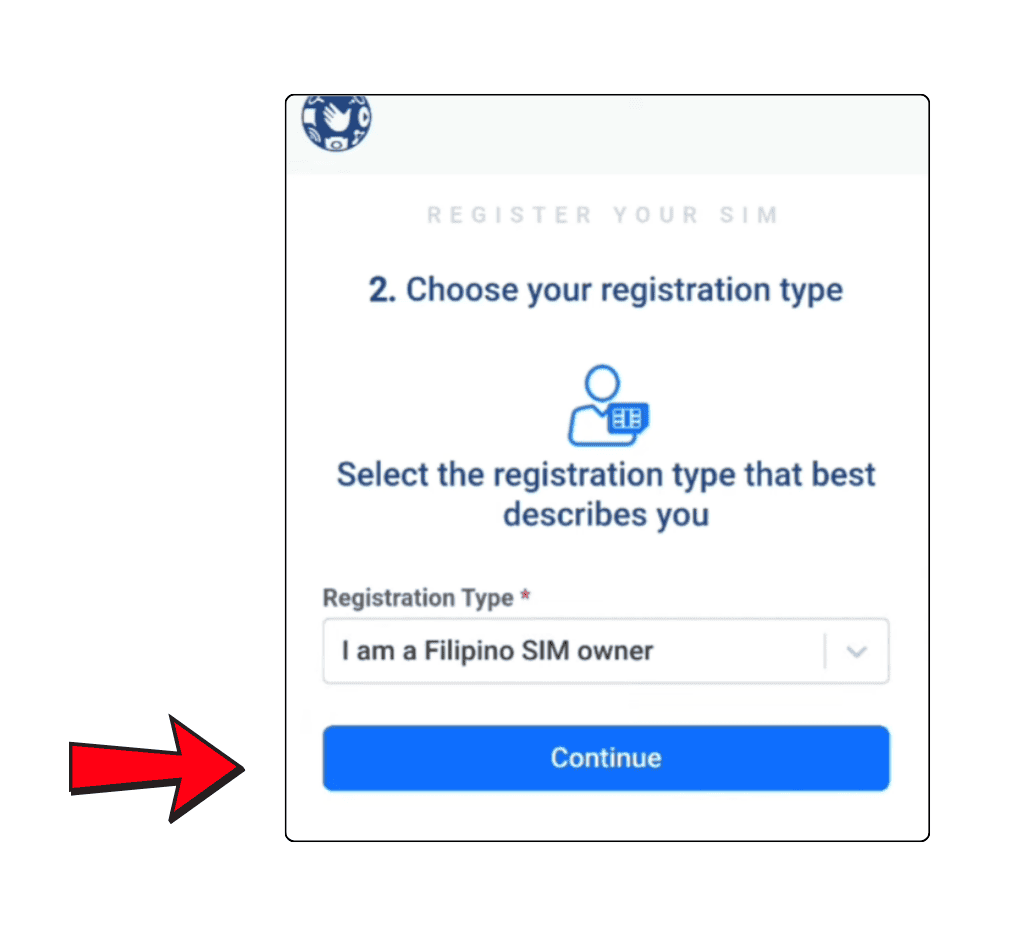
- Pick your registration type from the list.
- For example, choose “I am a Filipino SIM Owner” if it fits you.
- Then click Continue.
- You will see rules for uploading your ID and selfie.
- Read them carefully, then click Continue.
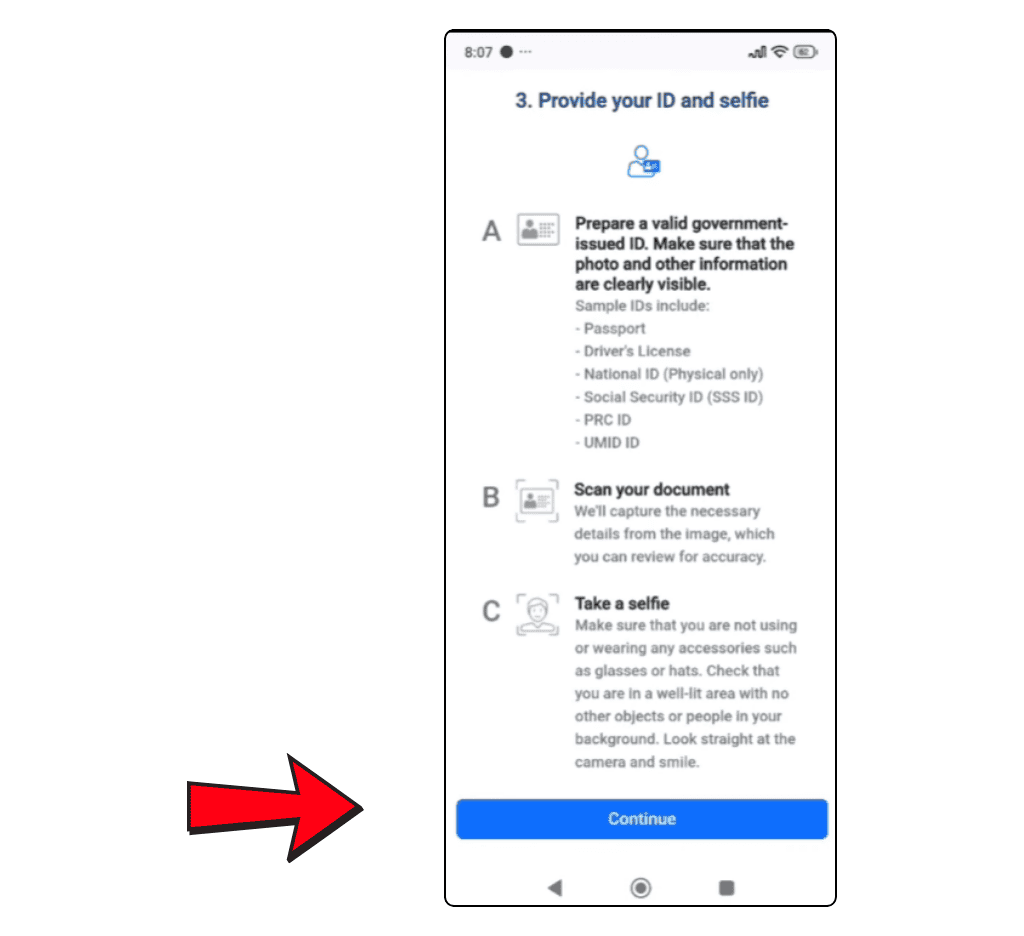
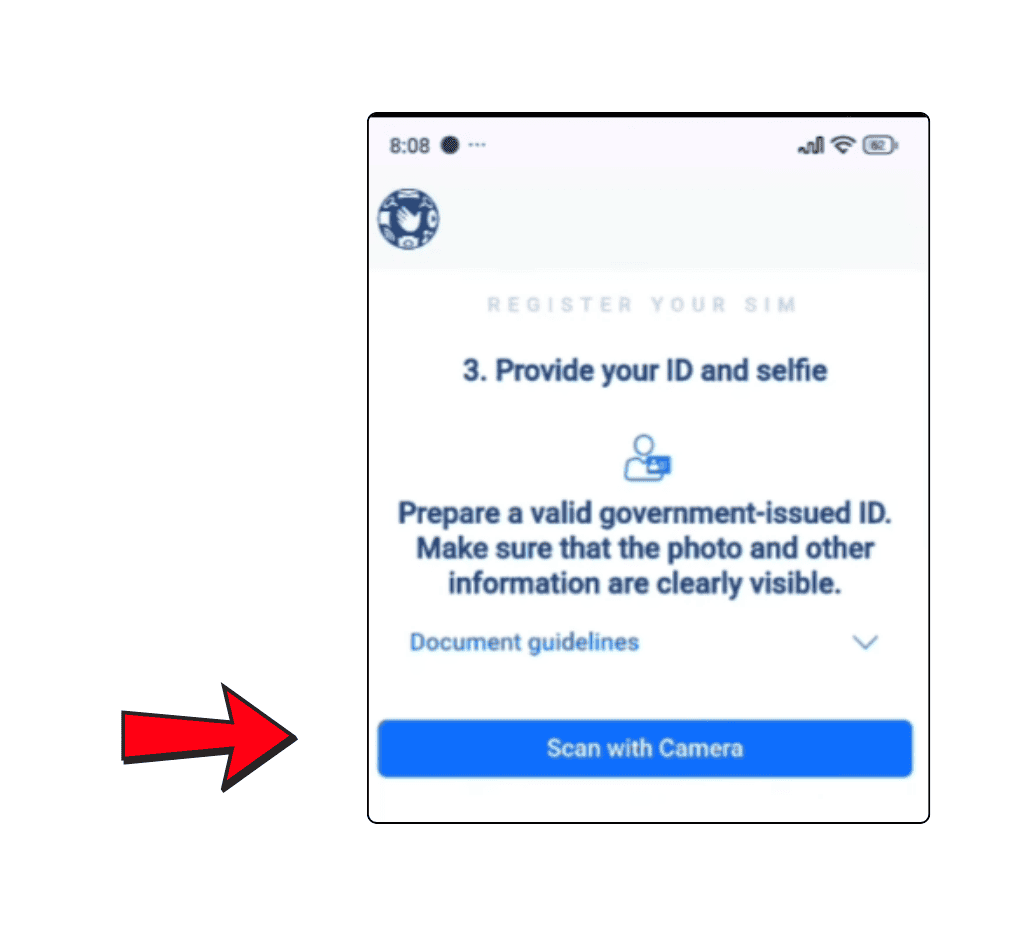
- Get a valid government ID ready.
- Make sure the photo, name, and details on the ID are clear and easy to see.
- Then click Scan with Camera.
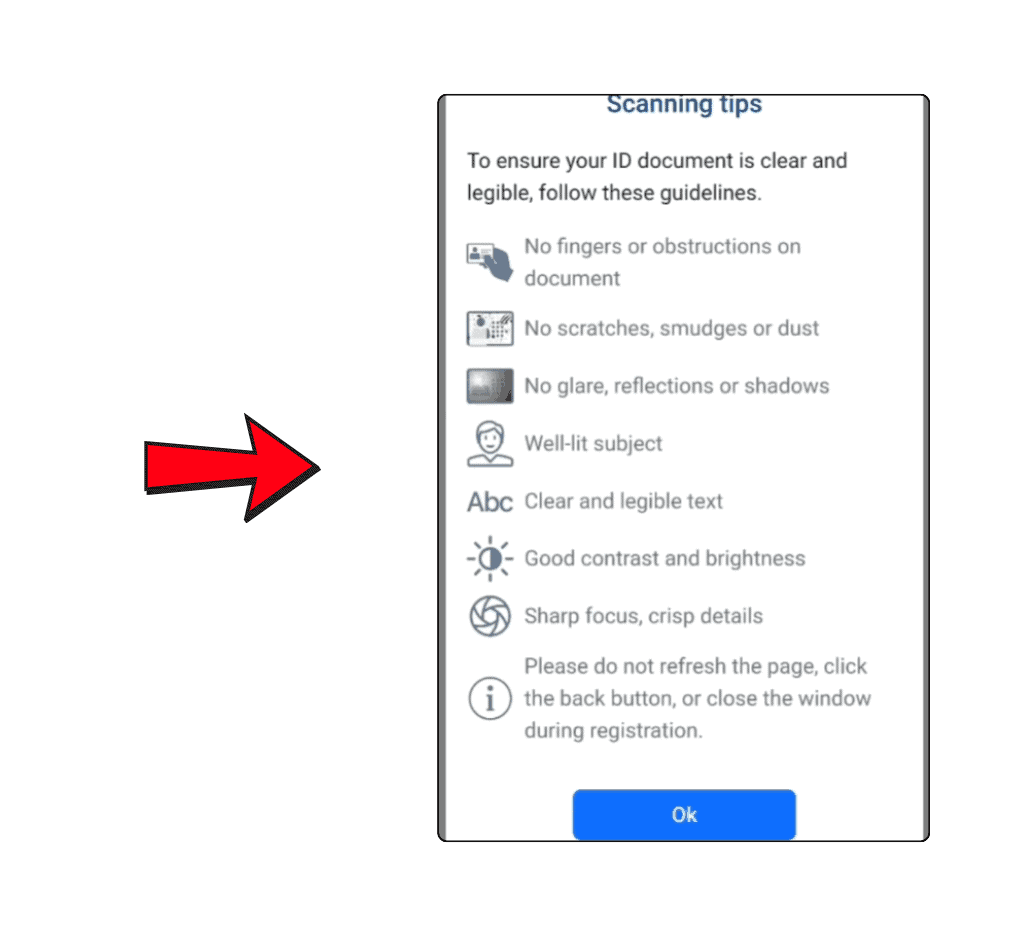
- Read the scanning tips carefully, then click OK.
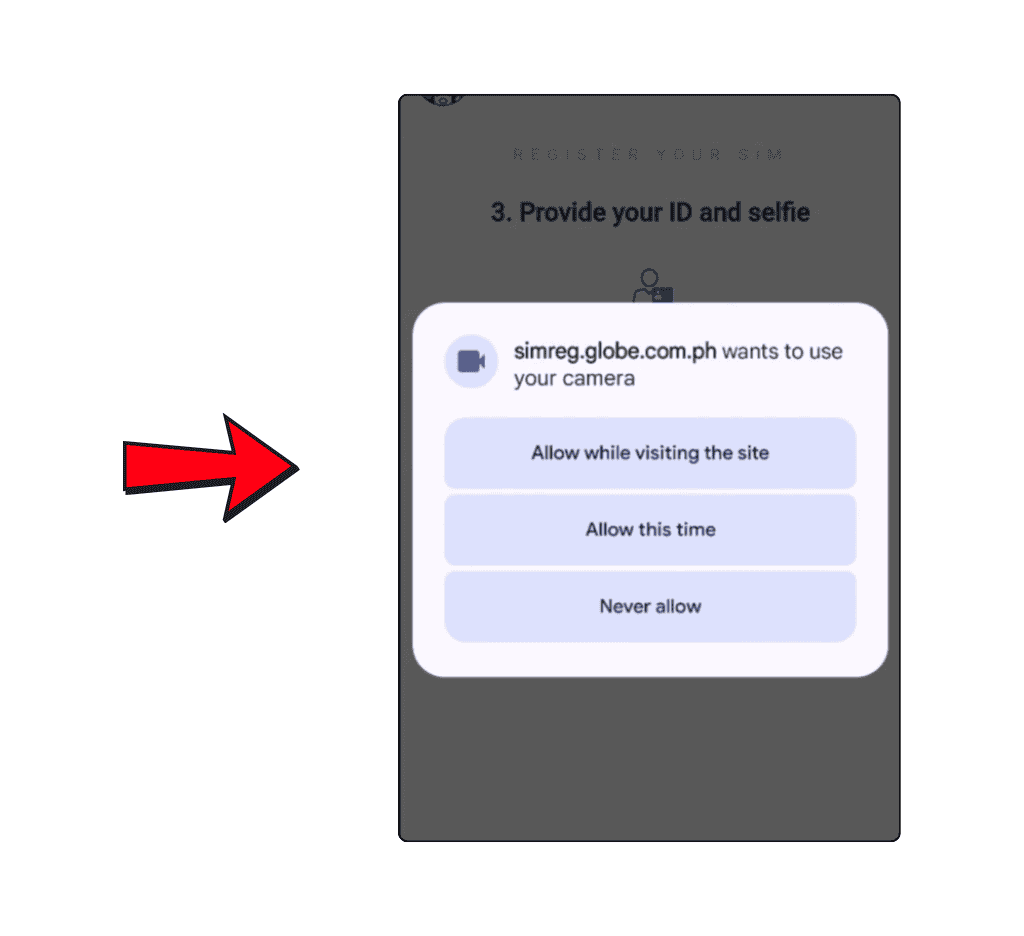
- When a message appears, click Allow while visiting the site to let the website use your camera.
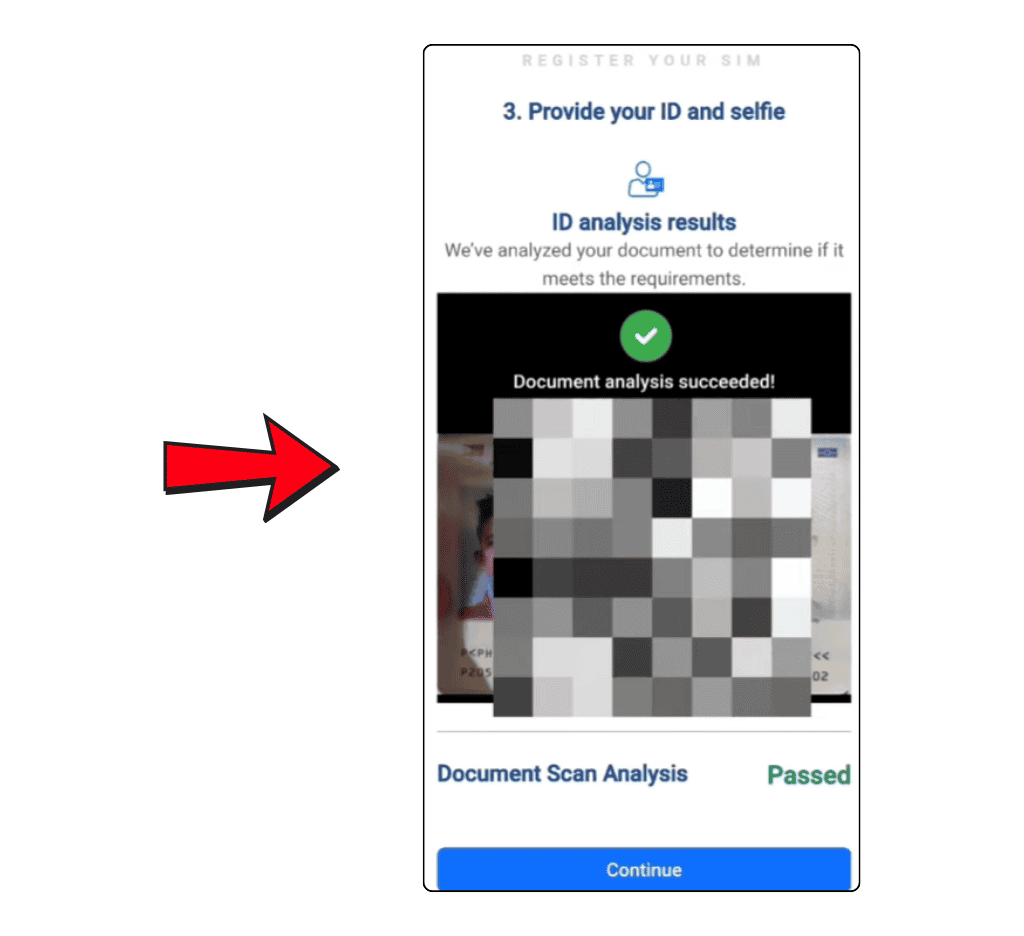
- Scan your ID, then click Continue.

- A message will show that says, “Document analysis succeeded.” This means your ID was scanned correctly.
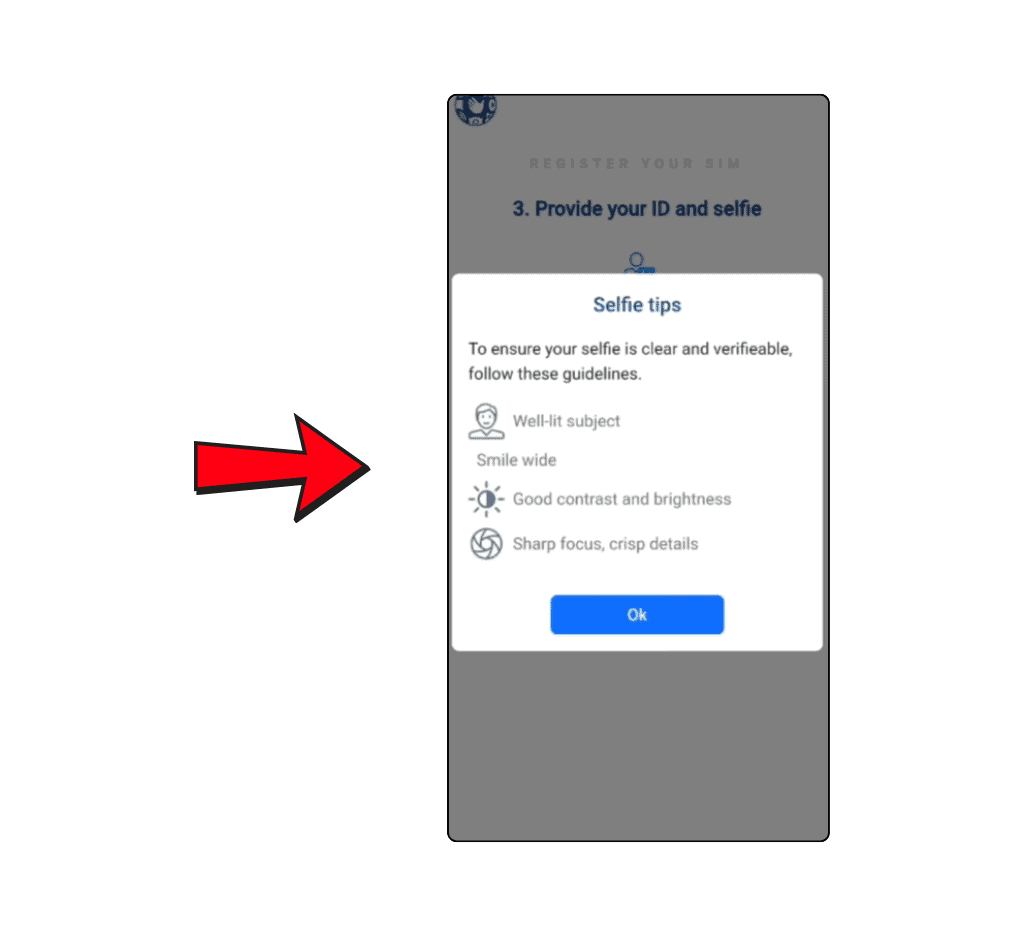
- Read the selfie tips carefully, then click OK.
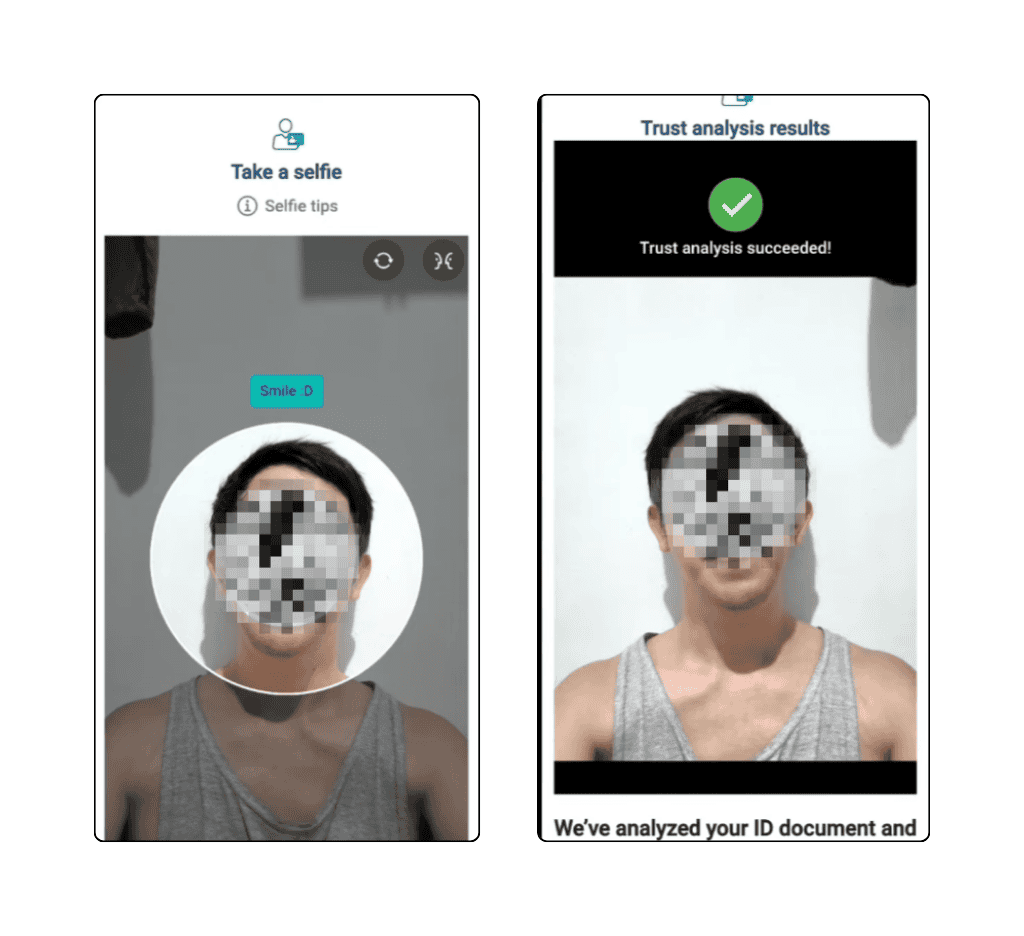
- Take a selfie with your phone or camera.
- If it works, you will see the message: “Trust analysis succeeded.”
- Then click Continue.
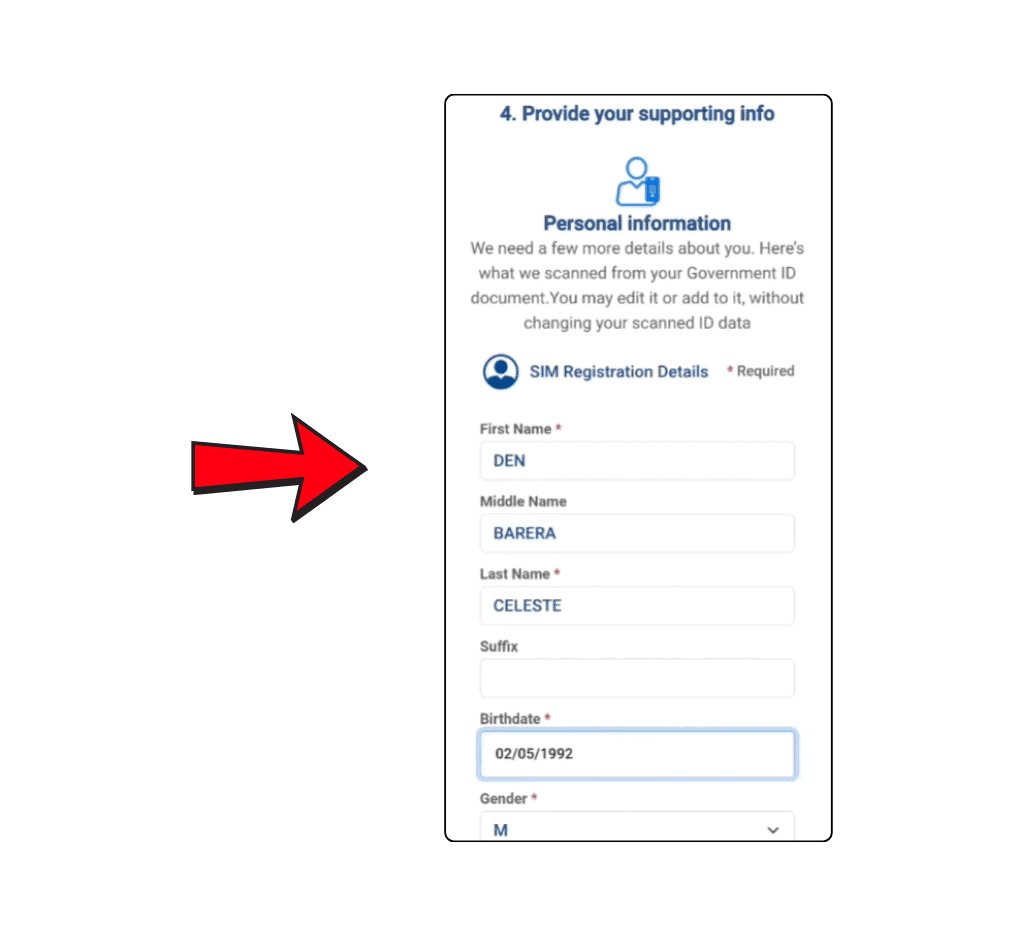
Type in your personal information, like:
- Full Name
- Birthday
- Gender
- Address
- Nationality
- Check the information you typed.
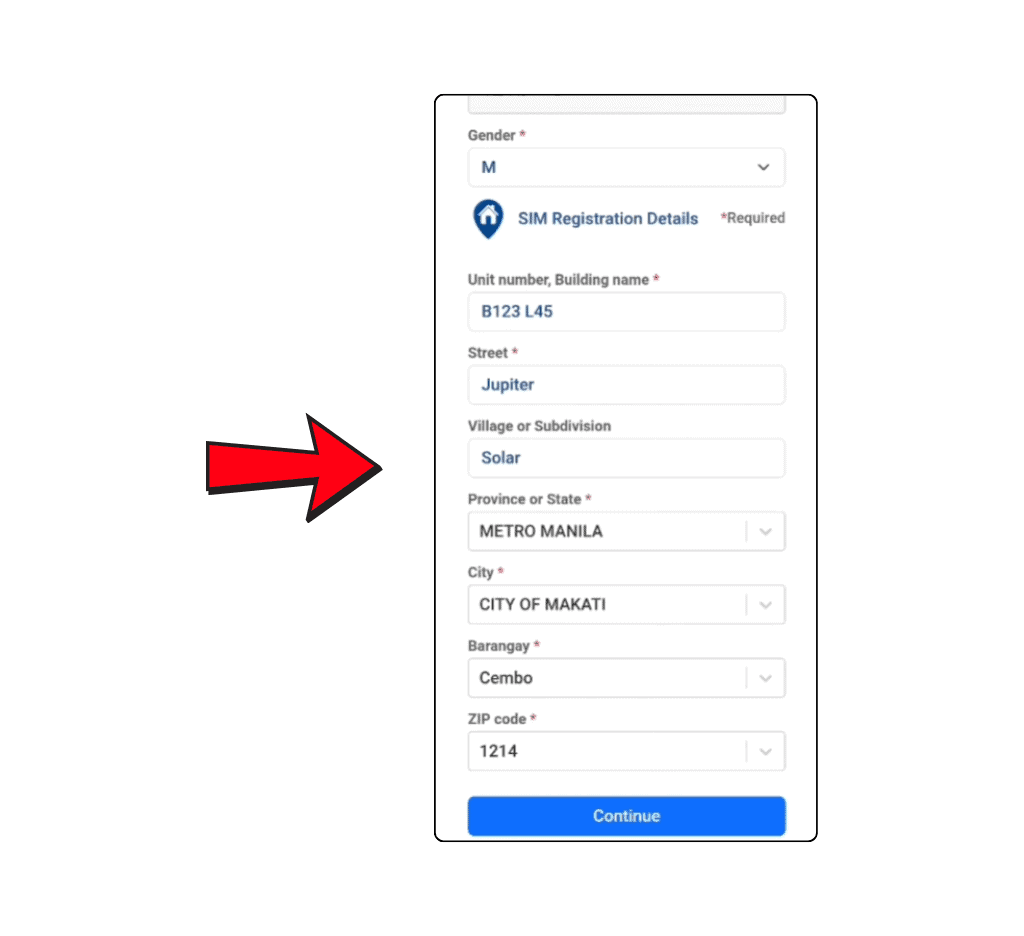
- If it looks correct, click Continue.

- Click the box that says, “I confirm this statement.”

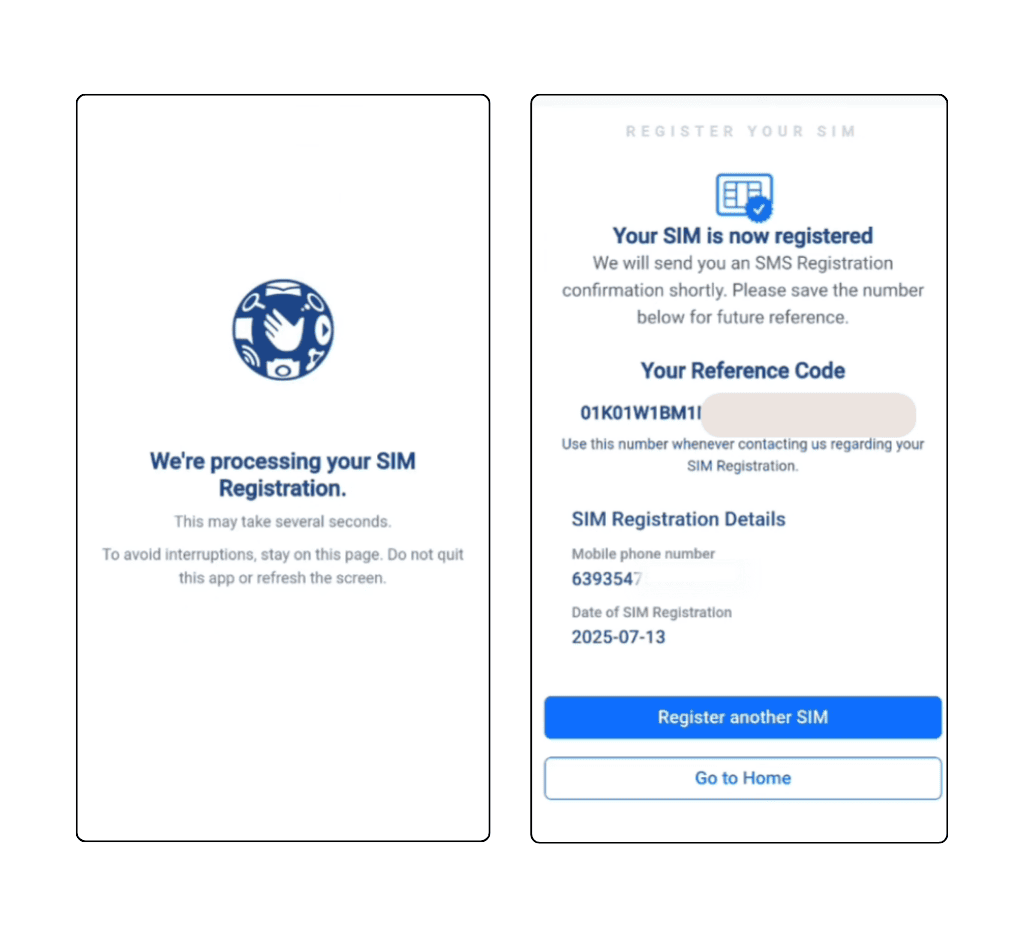
- Wait while your registration is being processed.
- Save the reference code or take a picture of it on your screen to keep as proof.
Note: Always use the official registration website to stay safe. Don’t use links from unknown places. Make sure the website address starts with HTTPS for security.
2. Register Your SIM Using the App
Registering on the app is almost the same as using the website. Here’s how to do it:
- Download the GlobeOne app on your phone.
- After downloading, make an account.
- On the app’s home page, look at the bottom right corner and click the Registration button.
- Type your SIM number carefully and click Verify to get an OTP.
- You will get an OTP (a special code) on your phone. Type the OTP to check your number.
- After your number is checked, you will see a registration form. Fill in all the details.
- Choose the type of ID you have and upload a clear picture of it.
- Take and upload a selfie for face verification.
- Check all your information carefully to make sure it is correct.
- Click Submit to send your form. You will get a reference number. Save this number for later.
Note: Always download the GlobeOne app from the official stores like Play Store or App Store. Never use apps from unknown places to register.
3. Register Your SIM at a Store
If you don’t want to register online, you can go to a Globe store to register your SIM card. Here’s how:
- Go to the nearest Globe store and bring the needed documents.
- Ask the staff to help you register your TM SIM card.
- The staff will help you finish the registration.
Note: If you want to register more than one SIM card, you can register them all under your name. Just follow the same steps for each SIM.
I have used a TM SIM for a long time and registered it many times. I think registering online is easier, but all three ways are safe and simple. You can choose the way you like best!
Tips for Successful TM SIM Registration
Registering your TM SIM card is easy, but here are some tips to help you do it without problems:
- Always give correct and updated information that matches your official documents. Don’t use wrong details like fake names or numbers to avoid mistakes and trouble.
- Upload a clear and real picture of your ID. Your selfie should be new and clear. The picture should not be bigger than 2 MB.
- Make sure your SIM card is put in the phone correctly. If it is not, you won’t get the OTP. If you use Wi-Fi, click the “Click here” link next to the OTP box to get the code.
- Always use the official TM SIM registration website or app. Don’t use apps or links from unknown places because they can cause problems.
- If you have any problems, contact TM SIM support. They will help you fix it.
These tips will help you register your TM SIM easily!
How to Check Your SIM Registration Status
After you send your registration form, you can check if your SIM card is registered. There are four ways to do this. Here are the details:
Check Using the Website
- First, go to the official website.
- Type your mobile number.
- You will get an OTP (a special code) that will tell you if your SIM is registered or not.
Check Using the App
- Open the GlobeOne app on your phone.
- Log in with your username and password.
- You will see your registration status on the app’s home screen.
Check Using TM Registration Number
- Open your phone’s message app.
- Type the word SMERG and send it to the TM registration number 8080.
- Wait a few seconds for a reply.
- If your SIM is registered, you will get a message saying, “Your SIM is registered.”
- If you don’t get a message, it means your SIM is not registered yet.
Check at a Store
- Go to the nearest Globe store.
- Ask the staff to check your SIM registration status.
- Give them some information they ask for.
- They will tell you your registration status in a few seconds.
You can use any of the ways above to check if your TM SIM is registered. Choose the one that is easiest for you. Remember, all the ways are safe to use.
Note: If your SIM is not registered yet, wait one day before you contact Globe support. Check the status again later, and maybe your SIM will be registered by then.
How to Check Your TM SIM Balance
After you register your TM SIM, you can add money (recharge) and check how much balance you have.
There are four different ways to check your TM balance. Here are the details:
Check Your Balance Using SMS
- First, open your message app.
- Type BAL and send it to 222.
- You will get a message back showing your balance and how long it is good for.
- This way is free and doesn’t cost any money.
Check Your Balance Using USSD Code
- Dial *143# on your phone and press the call button.
- Choose option number 7 for load inquiry.
- A message will pop up showing your balance.
To check someone else’s balance:
- Dial *143# and press call.
- Choose the account option, then balance inquiry.
- Pick “check another account” and type their phone number.
- You will see their balance.
This way is usually free, but sometimes there might be a small fee.
Check Your Balance by Phone Call
- Open the phone dial pad and dial 222, then press the call button.
- Listen and follow the voice instructions during the call.
- Remember, a small fee (about 1 Peso) will be taken from your balance.
Check Your Balance Using the GlobeOne App
- Download and install the GlobeOne app on your phone.
- Log in with your username and password.
- You will see all your balance information on the app’s home screen.
This way is free, but you need a good internet connection.
Note
You can also check your TM mobile data in these ways:
- Dial *143#, choose My account, then Data balance to see your data.
- Open the GlobeOne app, and your data will show on the home screen.
- Send a message with DATA BAL to 8080 to get your data details for free.
All the ways to check your balance are easy and safe. But my favorite ways are using the USSD code and the GlobeOne app.
These two are easy to use and don’t cost any money.
How to Switch to TM (SIM Card Portability)
TM lets you change your phone number from another network to TM Tambayan. This is called Mobile Network Portability. Here’s how you can switch to TM:
- First, make sure your current number is active, you don’t have unpaid bills, and you’ve used it for at least 90 days.
- Send a text with USC to 5050 from your current number. You will get a 9-digit code in reply.
- Go to the TM website or a TM store and ask for a new TM SIM.
- Give them your current number and the 9-digit code (USC).
- You will get your new TM SIM in 2-3 days.
- Put the new TM SIM in your phone. On the SIM menu, choose Port In, then Online Request.
- Type your old phone number and the 6-digit porting code you got from TM.
- Wait a few hours for the SIM to activate. After that, you can use the TM network with your old number!
Note: This process doesn’t cost any money. But you might lose some services connected to your old SIM, like GCash linked to your old number.
You can only switch networks once every 60 days. Your old SIM will stop working after the switch is finished. This way, you can change your network and start using TM.
Acceptable IDs for TM SIM Registration
Here are the official IDs you can use to register your TM SIM:
- UMID Card
- NBI Clearance
- BIR ID
- SSS ID
- OWWA ID
- Voter’s ID
- Senior Citizen ID
- IBP ID
- Driver’s License
- PRC ID
- Passport
- Philhealth ID
- Philippine National ID
Requirements for TM SIM Registration
What you need to register your SIM card depends on who you are. The rules are different for Filipino citizens, minors (kids), companies, and foreigners. Here is the full list of what each group needs:
For Filipino Nationals
You need to give:
- Your phone number
- Full name
- Address
- Birthday
- A government ID with your picture and ID number
- Proof that all your information is correct
- Your gender
Note: For kids (minors), the SIM card will be registered using the guardian’s details and ID. So, the guardian’s information and ID are needed to register the SIM for minors.
For Corporations (Companies)
They need to provide:
- Registered company name
- Full company address
- Official name of the person who represents the company
- List of mobile numbers to register
- SEC or DTI certificate (proof the company is real)
- BIR certificate or form 2303 (tax papers)
- Board resolution or secretary’s certificate (company approval papers)
- A valid government ID of the authorized person
- Special power of attorney (if needed)
- LGU, SUC, or Embassy documents (if needed)
For Foreigners
The things you need to register depend on what type of foreigner you are.
Tourists need:
- Full name
- Birthday
- Gender
- Address
- Mobile number
- A copy of your passport (the pages with your picture and visa)
- Proof of your address in the Philippines
- A return or onward ticket showing when you will leave
Foreign residents need:
- Full name
- Birthday
- Gender
- Address
- Mobile number
- Passport (the pages with your picture and visa)
- Proof of your address in the Philippines
- ACRI Card (Alien Certificate of Registration)
- Official ID from the visa authority
- Work permit (if you have a job)
- Student ID (if you are a student)
- Legal travel papers from the Department of Justice (if you are a Person of Concern)
- Foreign missions or embassy documents (if needed)
- Official name of the company or school representative (if needed)
- Documents from state universities or colleges (if needed)
- List of mobile numbers to register
- BIR certificate or form 2303 (tax papers)
Note: The SIM card for foreigners will only work for 30 days. After 30 days, it will stop working automatically.
Troubleshooting Registration Errors
Many TM users have problems or mistakes when trying to register their SIM cards online. Here is some helpful information to fix these problems:
SIM Card Already Registered
If you see a message saying your SIM card is already registered, do this:
- Call the Globe helpline and tell them about your problem.
- The support team will check and help you fix it.
This problem usually happens when someone else used the SIM before and didn’t deactivate it.
Invalid ID
If you get an error saying your ID is not valid, try this:
- Check if your ID is still valid and not expired.
- Make sure you write your name, birthday, and address exactly like on your ID.
- Upload a clear picture of your ID. It should not be blurry, and the signature should be easy to see.
- Make sure the picture is not bigger than 2 MB.
Selfie Issue
If you have a problem with your selfie, try this:
- Upload a clear and good-quality selfie. Make sure your face can be seen well.
- Don’t use blurry or filtered selfies.
- Make sure the photo is not bigger than 2 MB.
OTP Not Received
If you don’t get the OTP (code), try these tips:
- Check if you typed the right phone number.
- Make sure your phone has a good network signal.
- Wait 15 to 20 minutes before trying again.
- Look in the spam or junk messages folder in your SMS app.
Registration Time Out
If you get a “time-out” error while registering your TM SIM, try this:
- This usually happens when many people are using the system at the same time. Wait a little while and try again.
- Clear the cache (temporary files) on your phone or computer and try again.
- Use a strong and steady internet connection before you try again.
App Crashed
Sometimes, the app stops working when you try to register your SIM card. Here’s what you can do to fix it:
- Make sure you are using the newest version of the GlobeOne app.
- Clear the app’s cache. You can do this by going to your phone’s settings and clearing the app’s cache.
- If it still doesn’t work, wait a little while (especially during busy hours) and try again later.
Need More Help?
If you have a different problem, you can contact the TM SIM Help Center and tell them about it. The support team will check your issue and help you fix it.
Why Do You Need to Register Your SIM?
After a new law was made, all TM users must register their SIM cards. If your SIM is not registered, you won’t be able to use it.
There are also big punishments if the rules are broken:
- If someone gives fake information or fake ID to register, they can go to jail for 6 months to 2 years and pay a fine of up to ₱300,000.
- If someone steals a SIM card, they can get the same punishment.
- If phone companies (telcos) don’t register your SIM without a good reason, they can be fined ₱100,000 to ₱1 million.
- If someone from the telco shares your personal data without permission, they can be fined ₱500,000 to ₱4 million.
TM SIM Helpline
If you have a problem with your TM SIM, there are easy ways to get help:
- Call TM Helpline: (02) 7730-1500 or just dial 808
- Visit the Website: https://www.globe.com.ph/contact-us
- Message on Facebook: TM Messenger Help
You can contact the TM support team anytime you need help. They will check your problem and fix it as soon as they can.
FAQs
My Final Thoughts
The SIM Registration Act says that everyone must register their SIM card, both old and new users.
You can register your TM SIM by:
- Using the official website
- Using the GlobeOne app
- Visiting a TM store
It’s easy! Just give your details and upload your ID. Then your SIM will be registered. If you have any problems, you can ask for help in the comments or contact the TM SIM Helpline.
Good job
Sim registration
I will register my Tm